Writing Your First React App
14 September 2020 - 📖 25 minWhat is React?
While we can build websites with vanilla JavaScript (no additional packages installed), there are certain things which make this either difficult or tedious. [1] There are common features to websites which others have already implemented, so why would we spend time creating our own features from scratch every time? You may want an image carousel on your website, however you don't have to spent time working out how to make the internals of it work because someone else already has. Therefore, we can build upon the work of others to create something we otherwise could not.
![Figure 1 - Various application frameworks (Angular, React, Vue) [2].](/static/fbeebd799ecc876f2813ab9d2004e630/cbae3/frameworks.jpg "Figure 1 - Various application frameworks (Angular, React, Vue) [2].")
Application frameworks are a natural extension of this; they create abstractions on top of software to make desired functionality easier to implement, and give us a certain set of criteria to build our app around so we don't have to think of a good way to structure things (this is called the inversion of control, for the curious...). [3] Many of these application frameworks exist, each with their own strengths, however one of the most common is the JavaScript framework, React. [4]
How Does React Work?
React will single-handedly deal with everything on the frontend of our website (the structure of the webpage, the styling, and the functionality). It is comprised of two parts:
- Functionality to create modular pieces of reuseable code, called components (The application part).
- Functionality to help us insert our code into the webpage (The virtual DOM part).
We install these two parts by importing two packages using npm (node package manager).
npm install react react-domThe Virtual DOM Part
The react-dom import deals with the creation of a virtual DOM. This can be through of as a second layer that sits on top of the real DOM on our webpage, almost mirroring it. Pretty much all the code we write in React will only interact with this virtual DOM. When we want to actually show the code we have written to a user on our webpage, we have to copy all the changes we made to the virtual DOM into the real DOM. However, we don't have to do this ourselves as React runs an algorithm to figure out the most efficient way to do this. Updating the virtual DOM is lightning fast, however updating the real DOM is comparatively like moving through a tarpit; this is why it is more efficient and overall faster to let React handle this updating for us (again for the curious, this process is called Reconciliation). [5] [6]
![Figure 2 - A visualisation of React's virtual DOM by Maggie Appleton [5].](/static/fc1d0190dec6dd48b7c245bee3e28152/6b50d/reactdom-maggie-appleton.png "Figure 2 - A visualisation of React's virtual DOM by Maggie Appleton [5].")
We can begin to use this by using the ReactDOM library.
import ReactDOM from "react-dom";

ReactDOM.render(
    <h1>You can see me on the webpage!</h1>,
    document.body
);
Above, we import the ReactDOM library, and then use its associated render() method to place the <h1></h1> tag inside the body of our HTML document (in which we would add this JavaScript as a <script> tag for instance). This allows us to effectively write almost all our HTML inside our JavaScript file - the stuff we tell ReactDOM to render() is what we place into the virtual DOM, then React handles the process of updating the actual DOM for us.
The Application Part
However, the true power (for us, anyway) of React lies in the react import. This is the part of React which deals with point 1 above; it allows us to package up our HTML into components - self-contained snippets of JavaScript and HTML. [7]
import React from "react";
import ReactDOM from "react-dom";

const App = () => {
    return (
        <h1>You can see me on the webpage!</h1>
    )
};

ReactDOM.render(
    <App />,
    document.body
)
This is functionally equivalent to what we had before, however now we are telling our webpage to display our custom HTML element, <App /> (our component), which will return the original HTML we had. This is an extremely powerful technique, as it allows us to segment our code into smaller chunks and simply import in whatever components we need, when we need them. This concept is known as modularisation; splitting up something large into smaller, reusable chunks. [8] We can take this one step further, and actually begin to separate our code entirely into different files, App.js and index.js, and just import our <App /> from App.js.
// in App.js
import React from "react";

const App = () => {
    return (
        <h1>You can see me on the webpage!</h1>
    )
};

export default App;


// in index.js
import React from "react"
import ReactDOM from "react-dom";

import App from "./App.js"

ReactDOM.render(
    <App />,
    document.body
)
Therefore, we could begin to think of structuring our project by having each component in a separate .js file, importing the components we need in each file, and rendering them all in index.js.

NOTE - These are merely guidelines! Dan Abramov, a prominent React contributor often seen as an authority on the subject, wrote up a "guide" on how to structure react projects: it only contains the words: "move files around until it feels right". If your structure makes sense to you and your peers, then it's correct. [9]
What's Going On Internally?
Now there's a lot to unpack in this small example, but this is in essence how React works - remember, you're still writing JavaScript at the end of the day. Our browsers don't know what ReactDOM.render() does, and so when we write this it is actually converted into plain old JavaScript that our browsers can understand.
Take for instance our App.js file we've mentioned a couple times:
// in App.js
import React from "react";

const App = () => {
    return (
        <h1>You can see me on the webpage!</h1>
    )
};

export default App;
Before being execute by our browsers, this must actually be converted into an alternative form before they understand what we're trying to do. The converted form that our browser will execute will look something like the following:
"use strict";

Object.defineProperty(exports, "__esModule", {
  value: true
});
exports.default = void 0;

var _react = _interopRequireDefault(require("react"));

function _interopRequireDefault(obj) {
    return obj && obj.__esModule ? obj : { default: obj };
    }

const App = () => {
  return (
      /*#__PURE__*/_react.default.createElement(
          "h1", null, "You can see me on the webpage!"
          )
    );
};

var _default = App;
exports.default = _default;
Removing some of the fluff that we aren't interested in, we are left with:
const App = () => {
  return (
      /*#__PURE__*/_react.default.createElement(
          "h1", null, "You can see me on the webpage!"
          )
      );
};

var _default = App;
exports.default = _default;
While looking different from what we wrote in App.js, we can still understand what this might be doing! It seems that our component, <App />, has been converted into a call to _react.default.createElement() with the parameters "h1", null, "You can see me on the webpage!". From this, we can probably guess that this function will create a <h1> element, and add the text "You can see me on the webpage!".
While this example may seem simple, you can imagine this gets out of hand fast:
import React from "react";

const AnotherComponent = () => {
	const name = "Josh";
  	return(
    	<div>
            <span>Hello, {name}</span>
      	</div>
    );
};

const App = () => {
    return (
      <div>
        <div>
        	<div>Hello World!</div>
      	</div>
      	<AnotherComponent />
    </div>
    );
};

export default App;
Adding in another component, <AnotherComponent /> and adding in the variable name leads to the following monstrosity:
"use strict";

Object.defineProperty(exports, "__esModule", {
  value: true
});
exports.default = void 0;

var _react = _interopRequireDefault(require("react"));

function _interopRequireDefault(obj) { return obj && obj.__esModule ? obj : { default: obj }; }

const AnotherComponent = () => {
  const name = "Josh";
  return /*#__PURE__*/_react.default.createElement("div", null, /*#__PURE__*/_react.default.createElement("span", null, "Hello, ", name));
};

const App = () => {
  return /*#__PURE__*/_react.default.createElement("div", null, /*#__PURE__*/_react.default.createElement("div", null, /*#__PURE__*/_react.default.createElement("div", null, "Hello World!")), /*#__PURE__*/_react.default.createElement(AnotherComponent, null));
};

var _default = App;
exports.default = _default;
or, more "simply":
const AnotherComponent = () => {
  const name = "Josh";
  return /*#__PURE__*/_react.default.createElement("div", null, /*#__PURE__*/_react.default.createElement("span", null, "Hello, ", name));
};

const App = () => {
  return /*#__PURE__*/_react.default.createElement("div", null, /*#__PURE__*/_react.default.createElement("div", null, /*#__PURE__*/_react.default.createElement("div", null, "Hello World!")), /*#__PURE__*/_react.default.createElement(AnotherComponent, null));
};

var _default = App;
exports.default = _default;
Notice how we end up with multiple nested calls to _react.createElement()? This would be horrible to write and debug, and is not very clear in what the end result will actually look like.
JSX
It's no suprise, therefore, that when we write code in our React project, we don't use the _react.default.createElement() function. Instead, we use that alternate syntax we used before - syntax I have hitherto incorrectly been calling "HTML".
const App = () => {
    return _react.default.createElement("h1", null, "Hey")
}; // We don't do that here

const App = () => {
    return <h1>Hey</h1> // We do this instead
};
This syntax looks almost exactly like HTML - however, it is actually JSX (meaning, JavaScript XML). Functionally it behaves the same as HTML in most cases, however, as eluded to before, we can write JavaScript code inside JSX using the { } syntax. [10]
const App = () => {
    const name = "Josh"
    return (
        <h1>
            Hey, I'm { name } and I'm { new Date().getFullYear() - 1997 } years old!
        </h1>
    ) // "Hey, I'm Josh and I'm 23 years old"
};
We don't worry about converting JSX into a language that browsers understand (remember those _react.default.createElement() calls?), as we use a library called Babel to do this for us (once again for the curious, this process of converting code is called transpiling). This is what I used to create those ugly functions above - give it a shot! Take some of the JSX examples shown here or online, and convert them into non-JSX form to see how much easier Babel and React are making it for us! [11]
 and transpiled code (right).")
Making a React Application with Create React App
So we need
react,react-dom, andbabel. Then we probably needwebpacktoo. And a server to run it on sowebpack-dev-server... This is starting to get out of hand...
Cue create-react-app! Create-React-App (CRA) does all the heavy lifting for us when it comes to creating React projects. It installs all the dependencies we'll need for us, it starts up a server to host our React app, creates a bunch of starter files, and populates our package.json with various scripts, such as start which will open up our react project so we can actually see what we've done! [12]
To get started with this, we have to install and run create-react-app - to do this in one step we can run
npx create-react-app name-of-projectwhere npx means "install with npm and then execute". Now, this will take 3/4 minutes to finish running because there is just so many dependencies and things to set up. Luckily, we don't have to do any of this! A simple Hello, world! -type application is about 185Mb in size. The majority of that is taken up by the node_modules folder, which is where all the dependencies such as babel and react-dom are stored.

We don't have to worry about most of this, however it should be noted that we will place the majority of our files inside the src folder. There is also a public folder, in which is kept our index.html. Inspecting this index.html will reveal an extremely short file, consisting mainly of overhead with a single interesting line:
<div id="root"></div>Inspecting the index.js within the src file will also reveal a clue as to why this empty div exists.
index.js
import React from 'react';
import ReactDOM from 'react-dom';

import App from './App';


ReactDOM.render(
    <App />,
    document.getElementById('root')
);
What this ReactDOM.render() function is doing is taking everything defined in App, and shoving it into that <div> with an id of "root". [13] We could think of this as simply:
<div id="root">
    <!-- Everything in App gets put in here -->
</div>
Therefore, let's create an App.js file which will return a <div> containing the text "Hello, world!.
App.js
import React from "react";

const App = () => {
    return (
        <div>Hello, world!</div>
    );
};

export default App;
React will render this inside our index.html, such that the end result will be:
<!-- Stuff above -->
<div id="root">
    <div>Hello, world!</div>
</div>
<!-- Stuff below -->
That is all React is doing. It looks like magic, and the inner workings of it certainly are, but in reality the concept is relatively simple:
Write all your HTML (note: JSX ) inside JavaScript files, and render them all within a single
<div>inindex.html.
Now, when we have many components all nested within each other, props flying around, state to worry about, and various other libraries inserting and deleting things (react-router, redux, axios...) this can get extremely complicated, but at the end of the day this is at the core of how React works.
Components Revisited
Components form the building blocks with which we make React applications. Think of them as the bricks you use to make a house. For instance, <App /> above is a component. Components come in two flavours: Class Components and Function Components.
Class Components
We shall start with Class components, however note there has been a shift towards function components in recent years for reasons that we will discuss later. A class component, as you'd think, is defined as a class in JavaScript (we shall leave discussions of why these technically aren't classes for another day!). [14]
import React from "react";

class App extends React.Component {
    render(){
        return <div>Hello, world!</div>
    };
};

export default App;
We state that App shall be a class with the class App line, and then say that it will extend another class defined in the React library called Component. This means that our class, App, will have access to all the methods and properties the smart guys at Facebook placed into the React.Component class. It has a render() method (the inner workings of which is defined in React.Component), from which we return the JSX we want to display to the user. This render() method will be called whenever a component is told to render to the webpage - a topic we shall cover shortly.
We can assign other methods or properties to our class too - though we don't need to use a declaration to do so (no need to say let, const or var when defining a new method or property).
import React from "react";

class App extends React.Component {
    name = "josh";

    age = 23;

    render(){
        return (<div>Hello, I'm {name} and I'm {age} years old!</div>)
    };
};

export default App;
NOTE - The above seems like it should output
<div>
    Hello, I'm josh and I'm 23 years old!
</div>However, if you try to run this you might be faced with an error. When we create an instance of our class component, we are creating an Object. As such, when we attach properties/methods to it, such as name above, we never declare them to JS. For example, when we say :
const name = "Josh"in our JS code, we are saying "Hey JS, please set aside some space in memory, label it 'name' and store inside it the value "Josh"".

If we tried to do the same thing on an Object:
const obj = {
    name: "Josh",
    sayName() {
        console.log(name)
    }
};

obj.sayName();
we are saying "Hey JS, set aside some space in memory, call it obj and place into it a section called 'name' which stores "Josh". Also place into it a function which will log out a variable called 'name'. Oh, what's name? Just go into memory and.... oh". We never store name in global memory, only within obj. We haven't yet finished setting aside that memory yet, so we can't access it! Without delving too deep into how classes and the class keyword function in JavaScript, let's just say this:
When we want to access properties associated with a
classwe prefix the property with a value calledthis. [15]
import React from "react";

class App extends React.Component {
    name = "Josh";

    render(){
        return (<div>Hello, {this.name}!</div>)
    }; // Hello, Josh!
};

export default App;
This (Pun intended) is the correct code that will output:
<div>
    Hello, josh!
</div>
Similarly, we would need to reference this when calling a method defined in our class component, because classes in JavaScript are actually Objects under the hood. [16]
import React from "react";

class App extends React.Component {
    name = "josh";

    age = 23;

    printAge = function () {
        console.log(this.age)
    }

    render(){
        this.printAge(); // 23
        return (<div>Hello, {this.name}!</div>);
    };
};

export default App;
Here, we define a printAge() method on the class App which will print this.age, and we call it within our render() method.
Function Components
Function components avoid the usage of this, and are instead treated as... well, functions: we can define functions within them, define variables within them, and call them all without having to worry about this as we are actually declaring variables. Here is a function component version of the above App which will behave in the same way.
import React from "react";

const App = () => {
    const name = "josh";
    const age = 23;

    const printAge = () => {
        console.log(age)
    };

    printAge();

    return(<div>Hello, {name}!</div>)
};

export default App;
Notice a few differences:
- We do not extend
React.Componentas we have no need to access therender()method - we simply return from the function what we want to render. - We define it as a function instead of a class (hence the name function component).
- We define properties and methods as we would in normal JavaScript - with a declarative statement
let,constorvar. - We call
printAge()within the function body itself - this is because the entire function is run again when the component is called to re-render itself (more on this later), as compared to theclasscomponent where only code written in therender()method would be run after initialization. - Lastly, and perhaps most importantly, no faffing about with
this(can you tell im biased?).
Rendering a Component
A quick aside - I've mentioned render quite a few times so far. Rendering is when we convert the JSX we return from our components into HTML to be placed into the webpage. Remember that stuff about a virtual DOM? Well rendering is the process of updating nodes in the real DOM to match that of the virtual DOM. This means that our JS will be run, and the resulting JSX will be displayed to the screen by being put into that <div id="root"> mentioned previously. React decides when to re-render a component, usually when a user visits a page which we specify needs to display a certain bit of JSX, or when our state/props updates - more on this... Now!
Props
Function Components
Now, as vain as I am, it would be nice if people could write their own name and age within our component when they call it. This would allow the component to be a lot more reusable. This is simplified for us (once again) by React, as React will automatically pass an object called props to our components. For instance, in our index.js where we call our <App /> component, we can pass down a variable by using that JSX syntax again:
index.js
import React from "react";
import ReactDOM from "react-dom";

import App from "./components/App";

ReactDOM.render(
    <App name={"Emily"} age={19} />,
    document.querySelector("#root")
);
This will attach the name and age properties to the props object that React passes down whenever we call a component. We access this within App by passing the the props component into our function declaration.
App.js
import React from "react";

const App = (props) => {
    // props = { name: "Emily", age: 19 }

    const printAge = () => {
        console.log(props.age)
    };

    printAge(); // 19

    return(<div>Hello, {props.name}!</div>) // Hello, Emily!
};

export default App;
This allows us to access all the properties placed onto props when App is called. We could even add another Object to this, for instance:
index.js
import React from "react";
import ReactDOM from "react-dom";

import App from "./components/App";

ReactDOM.render(
    <App person={ {name: "Emily", age: 19} } />,
    document.querySelector("#root")
);
import React from "react";
const App = (props) => {
// props = { person : { name: Emily, age: 19 } }
const printAge = () => {
console.log(props.person.age)
};
printAge();
return(<div>Hello, {props.person.name;}!</div>)
};
export default App;Notice the { {} } syntax when passing an object into JSX ( person= { {name, age} }) - one set of curly braces for declaring a JS expression, a second set to declare the object.
Class Components
Class components treat things differently - we do not have a function declaration to access the props object, but luckily React passes this to our class for us, and so we can immediately access it using the this.props syntax, however everything else remains the same as it was in with functional components - the only difference is how we access the props object.
index.js
import React from "react";
import ReactDOM from "react-dom";

import App from "./components/App";

ReactDOM.render(
    <App name={"Emily"} age={19} />,
    document.querySelector("#root")
);
App.js
import React from "react";

class App extends React.Component {
    // this.props = {name: "Emily", age: 19}

    printAge = function () {
        console.log(this.props.age)
    }

    render(){
        this.printAge();
        return (<div>Hello, {this.props.name}!</div>)
    };
};

export default App;
State For Class Components
State is why class components were needed for so long, and why functional components were second choice for most of React's lifetime. Now we have Hooks which eliminates this somewhat, however here we shall only cover adding state to class components.
We can pass some information down into a component via props. Wouldn't it be great if we had some way of continually feeding information to a component, from the component itself? What if we could keep track of some changing variable on the component itself? An example might be a simple counter.
import React from "react";

const Counter = () => {
    let count = 0;

    return(
        <div>
            <h1>The count is: {count}</h1>
            <button onClick={/* Increment the count upon click */}></button>
        </div>
    );
};
Okay this looks good, so after we click we then need to re-run our function to display the new count-- oh wait!
let count = 0;
// This line would reset our count to 0
// again upon re-rendering
We are then left in a stalemate:
- We re-render out component, thus resetting it to
0. - We increment count however don't re-render the component, so internally our
count = 1but this information is never displayed to the user!
To get around this tricky scenario, we need to introduce a new concept in React called state.
The way we add this in to a class component is a bit convoluted, so we'll go through it slowly.
import React from "react";

class Counter extends React.Component {
    constructor(props){

    };

    render(){
        return (<div></div>)
    };
};

export default Counter;
The first thing we do is to add a constructor function to our component, and feed in our props. This is a function built into JavaScript, which we do not need to know the details of. This constructor is called when the <Counter /> is first instantiated (when <Counter /> is first called), however not when it is re-rendered. This means we can initialize our count to be 0 when we first render it, without having to worry about resetting it on every re-render. Next, we call a built-in function called super passing in our props:
import React from "react";

class Counter extends React.Component {
    constructor(props){
        super(props);
    };

    render(){
        return (<div></div>);
    };
};

export default Counter;
super is a built-in function to JavaScript which will allow us to access all the properties and methods on the parent class of <Counter /> (which would be React.Component as we are extend-ing it). Without this call to super(props), we would lose access to render() and other methods defined therein. Now we finally get on to adding state:
import React from "react";

class Counter extends React.Component {
    constructor(props){
        super(props);
        this.state = {count : 0}
    };

    render(){
        return (<div></div>)
    };
};

export default Counter;
We assign this.state to an object, wherein we can begin to define the things we want to keep track of within our component. We can add multiple things to this.state, even other functions!
import React from "react";

class Counter extends React.Component {
    constructor(props){
        super(props);
        this.state = {
            count : 0,
            name: "Josh",
            sayCount: () => console.log(this.count)
            }
    };

    render(){
        return (<div></div>)
    };
};

export default Counter;
The Unavoidable 'This'
Great! Now we have access to state on our component, and can begin to work on the increment()/decrement() functionality. We use the event handler called onClick={}, which is an attribute we can attach to a JSX button; it literally means "when someone clicks on this, execute whatever is in the brackets".
So, simple right?
import React from "react";

class Counter extends React.Component {
    constructor(props){
        super(props);
        this.state = {count : 0}
    };

    increment(){
        this.state.count++;
    };

    decrement(){
        this.state.count--;
    };

    render(){
        return(
            <div>
                <h1>The count is: {this.state.count}</h1>
                <button onClick={this.increment}></button>
                <button onClick={this.decrement}></button>
            </div>
        );
    };
};
App.render().increment()
Note - we pass a reference to
increment/decrementinstead of calling the function (onClick={this.increment()}). This is because we wantonClickto be synonymous with callingthis.increment(). Passingthis.increment()(with the parenthesis) would assignonClick={}to be the return result of callingincrement()/decrement(). Looking at what wereturnfrom callingincrement/decrement, wereturnnothing, therefore we would be sayingonClick={null}. THIS IS IMPORTANT FOR LATER!
Well here's where things get a little more finicky. Remember this? this refers to the current execution context. When we enter a function, we create a new execution context, and so our this refers to the execution context in which the function was called. [14] A simple way to think of this:
thisrefers to someObject; whichObjectdepends on where the code is being executed from. [17]
When there is no Object attached to where we are when we execute our code, this defaults to be the global object, which, as it's name suggets, is an object visible to everything in our application. This global object is where functions like setTimeout are defined, and why we can use them in the top-level of our code. [18] Footnote - having Window, global, globalThis is annoying
setTimeout(() => console.log("hi"), 1000)is just shorthand for:
global.setTimeout(() => console.log("hi"), 1000);Things get more complicated when we start introducing other Objects into our code (such as the class Counter above).
function func (){
    console.log(this);
};

const obj = {
    inside: func
};

func() // Called from the global scope,
       // therefore 'this' = 'global' object.

obj.inside() // 'inside' = 'func',
// therefore 'inside()' = 'func()',
// therefore 'this' = 'obj' = {inside: [Function: func]}
//  as we are executing directly from obj.
To further explain why this can give different values, let's assign each calling context a variable.
function func(){
    console.log(this.num);
};

global.num = 5;

const obj = {
    num: 10,
    inside: func
};

func(); // Called from 'global',
// therefore 'this' = 'global'
// therefore 'this.num' = 'global.num' = 5.

obj.inside() // Called from 'obj',
// therefore 'this' = 'obj'
// therefore `this.num` = 'obj.num' = 10.
Notice how this.num will log out a different value depending on where we called it from?
Now, when we enter a new function (rather, when the code is being executed and it enters a new function during runtime) we enter a new execution context, and this gets set to the global object by default, usually. To illustrate this a little further, let's say we instead call func() from inside a function in obj.
function func(){
    console.log(this.num);
};

global.num = 5;

const obj = {
    num: 10,
    inside(){
        func();
    }
};

func(); // Called from `global`
// therefore `this.num` = `global.num` = 5.

obj.inside() // ???
What happens when we call obj.inside()? Well, when we enter a function we enter a new execution context (because functions are also Objects in JavaScript), therefore we get a new this. A good rule of thumb :
Look to the left of the
.and you'll be right most of the time.
Let's walk through the logic in that manner: obj.inner().func(). So in obj, this = global. In inside(), this = obj. In func(), this = inside() which is a function, therefore this = global. Therefore, we get 5 as our answer!
function func(){
    console.log(this.num);
};

global.num = 5;

const obj = {
    num: 10,
    inside(){
        func();
    }
};

func(); // Called from `global`
// therefore `this.num` = `global.num` = 5.

obj.inside() // Called 'func()' from within 'inside()'
// therefore 'this' = 'inside', 'this' of a function is
// 'undefined' and so JavaScript defaults to 'global'
// therefore 'this.num' = 'global.num' = 5.
The last piece of this puzzle, is that in JavaScript, class methods are not bound by default. [19] Remember when I said that, in a new function, JavaScript defaults to the global object if there's nothing to the left of the .? Well, in JavaScript, methods (functions we attach to classes) do not bind this automatically. What does this mean in practice?
class Test {
    logThis(){
        console.log(this);
    }
};

const example = new Test();

example.logThis() // Left of the dot is 'example'
// which is an instance of 'Test',
// therefore 'this' = 'Test' = { logThis: [function Function] }

const justTheFunction = example.logThis;

justTheFunction() // left of the dot is nothing,
// This is a reference to a class method
// class methods do not bind 'this' to a default value
// therefore 'this' does NOT default to 'global'
// therefore 'this' = 'undefined'
If we attempt to execute a a function which is a reference to a class method, our this is undefined! [20]
Looping back to our current issue, we are trying to assign a class method called this.increment/this.decrement to onClick. This is the same thing we are doing above which gave us an undefined this!
class Counter {
    increment(){
        console.log(this);
    }
};

const counter = new Counter();

counter.increment() // 'this' = 'counter' = 'class Counter'

const onClick = counter.increment;

onClick() // 'this' = 'undefined'
To fix this, we need to do one of two things:
1) Bind this.
This involves telling our class Counter that, whenever we call increment, we want to retain the current execution context (which, as we execute our constructor, is Counter):
 class Counter extends React.Component {
    constructor(props){
        super(props);
        this.state = {count : 0}
        this.increment = this.increment.bind(this);
        this.decrement = this.decrement.bind(this);
    };

    increment(){
        this.state.count++;
    };

    decrement(){
        this.state.count--;
    };

    render(){
        return(
            <div>
                <h1>The count is: {this.state.count}</h1>
                <button onClick={this.increment}></button>
                <button onClick={this.decrement}></button>
            </div>
        );
    };
};
Now that's a lot of this flying about, but remember this refers to whatever the context is of when we are running the code: upon reaching this in the constructor, our context is the Counter. The line
this.increment = this.increment.bind(this);will tell our Counter to always use the execution context of the Counter whenever we call increment, regardless of where we call this.increment(). But binding this is a strange behaviour and difficult to grasp, and I'm sure I've said this enough times for it to lose its meaning by now. The amount of bolding and italics in those last couple paragraphs should make clear just how easy it is to get confused when talking about the this object in JS, and how hard it can be to explain. So, we can do option 2 instead:
2) Use arrow functions
For most cases, arrow functions (() => {/* Do Stuff */} rather than function(){/* Do Stuff */}) behave the same as normal function declarations. To be clear, in most cases the following are equivalent:
function sayName(){
    console.log("Hi I'm Josh!");
}

const sayNameArrow = () => {
    console.log("Hi I'm Josh!");
}
One important difference, however, is that arrow functions do not have a this. [21] Entering a normal function, we enter a new execution context and therefore have a new this (which will default to global or be undefined if it is a class method). However, when we use this in an arrow function, JS will look within our function and check "do you define a variable called this?", and when it doesn't find one it goes up to the next outer function/object/block and checks "do YOU have a this variable?". This keeps going up the scope chain until a this is found. This means that the this in an arrow function is inherited from the block/function surrounding it.
const obj = {
   variousThis: function(){

       console.log(this); // Called 'obj.variousThis()'
       // therefore 'this' = 'obj'

       const logThis = function(){
           console.log(this)
       };

       logThis(); // Called 'logThis()' from within a
       // function, therefore 'this' = 'global'

       const logThisArrow = () => console.log(this);

       logThisArrow(); // Arrow functions do not have
       // a 'this', therefore will inherit it from their
       // surrounding function, which is 'obj' (see above
       // where we logged out what 'this' was in the
       // surrounding scope)
   }
};

obj.variousThis();
To put this in the same terms as we used above, we are doing the following.
class Counter {
    increment(){
        console.log(this);
    }
};

const counter = new Counter();

counter.increment() // 'this' = 'counter' = 'class Counter'

const onClick = () => counter.increment();

onClick() // 'this' = 'counter' = 'class Counter'
We instead assign onClick to be an arrow function which will call the function we want, instead of assigning it to be a reference to the function we want. Notice when we call increment() we have out . back, which will tell increment() to run using counter as its value for this.
 class Counter extends React.Component {
    constructor(props){
        super(props);
        this.state = {count : 0}
    };

    increment(){
        console.log(this.state) // { count: 0 }
        this.state.count++;
    };

    decrement(){
        this.state.count--;
    };

    render(){
        return(
            <div>
                <h1>The count is: {this.state.count}</h1>
                <button onClick={() => this.increment()}></button>
                <button onClick={() => this.decrement()}></button>
            </div>
        );
    };
};
There we go, we've overcome the this hurdle of this Counter!
BUUUUUUUT there's one more issue. If you take this code and try and run it, nothing will happen upon clicking the buttons. Nada. Zip. Ziltch. Your IDE might even throw a big red line under your code and tell you "Don't mutate state directly". This goes back to the whole point of why we needed to use a class in the first place: we want to keep track of a variable called count and re-render our component while keeping this updated variable and display its new value. Directly touching this.state will update the count variable, but it will not re-render the component. Luckily, the smart React guys solved this for us - on that React.Component class we extend from, they define a method called setState which we use to mutate the state of our Counter. The reason being is that .setState() will cause a re-render of our Counter after our state is updated! [22] We access it with this.setState() and pass in the updates we want to make:
 class Counter extends React.Component {
    constructor(props){
        super(props);
        this.state = {count : 0}
    };

    increment(){
        this.setState({count: this.state.count + 1});
    };

    decrement(){
        this.setState({count: this.state.count - 1});
    };

    render(){
        return(
            <div>
                <h1>The count is: {this.state.count}</h1>
                <button onClick={() => this.increment()}></button>
                <button onClick={() => this.decrement()}></button>
            </div>
        );
    };
};
Note - we only have to specify the values in state we wish to change. For instance, if
this.state = {count: 0, likes: 10}and we only wanted to updatecount, we could runthis.setState({count: 1})which would cause ourthis.stateto be{count: 1, likes: 10}. We can also update more than one piece of state in the samethis.setStatecall (e.gthis.setState({count: 10, likes: 0})would causethis.stateto be{count: 10, likes: 0}).
Finally, the above will work (although those buttons might be a bit small, let's add some text to them so people know on the webpage what the buttons do):
 class Counter extends React.Component {
    constructor(props){
        super(props);
        this.state = {count : 0}
    };

    increment(){
        this.setState({count: this.state.count + 1});
    };

    decrement(){
        this.setState({count: this.state.count - 1});
    };

    render(){
        return(
            <div>
                <h1>The count is: {this.state.count}</h1>
                <button onClick={() => this.increment()}>Increment</button>
                <button onClick={() => this.decrement()}>Decrement</button>
            </div>
        );
    };
};
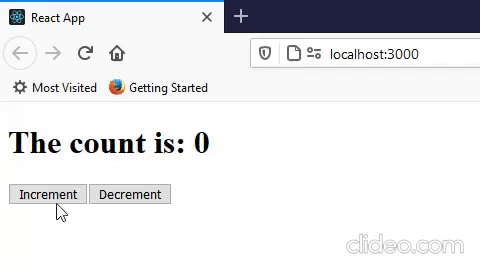
There we have it - the above is a functioning class-based counter component. Try it for yourself; replace your index.js file in the src directory of a CRA project with the following, and you too can have a cool little Counter app.
index.js
import React from "react";
import ReactDOM from "react-dom";

 class Counter extends React.Component {
    constructor(props){
        super(props);
        this.state = {count : 0}
    };

    increment(){
        this.setState({count: this.state.count + 1});
    };

    decrement(){
        this.setState({count: this.state.count - 1});
    };

    render(){
        return(
            <div>
                <h1>The count is: {this.state.count}</h1>
                <button onClick={() => this.increment()}>Increment</button>
                <button onClick={() => this.decrement()}>Decrement</button>
            </div>
        );
    };
};

ReactDOM.render(
    <Counter />,
    document.querySelector("#root")
);
Summary
We covered a lot of really heavy stuff, so I implore you to look for other resources and explanations. We covered the difference between class and functional components, how react works under the hood, the structure of a react app in CRA, props, and state.
What we did not cover was using state in functional components. This is because this would necessitate an explanation of the hooks system, released in React 16.8 in 2019, and this post has been long enough already. Rest assured, hooks are great and, in my opinion, much easier to understand than all the this tomfoolery using a class component. We also neglected almost the entirety of lifecycle methods like componentDidMount and componentDidUpdate. These would also necessitate their own post.
A few resources to learn from in addition to the References below: the official react documentation is a fantastic resource to learn from too, the counter example is almost the same as the one defined there in their "Getting Started" page. The ReactJS subreddit is also great for reading around the subject. Stephen Grider's Modern React course on Udemy is also brilliant for initial learning, although you might have to wait for a deal on Udemy to get it for ~£10 (the sales come by very frequently so keep an eye out).
References
- https://medium.com/dailyjs/the-deepest-reason-why-modern-javascript-frameworks-exist-933b86ebc445
- https://medium.com/@chsvk/vue-vs-angular-vs-react-in-2019-answered-4ec8dc96e602
- https://en.wikipedia.org/wiki/Software_framework
- https://www.npmtrends.com/react-vs-vue-vs-@angular/core
- https://twitter.com/Mappletons/status/1103717355392286721/photo/1
- https://reactjs.org/docs/faq-internals.html
- https://en.wikipedia.org/wiki/React_(web_framework)#Components
- https://learn.co/lessons/react-modular-code
- https://mobile.twitter.com/dan_abramov/status/1027248875072114689
- https://reactjs.org/docs/introducing-jsx.html
- https://babeljs.io/repl
- https://create-react-app.dev/docs/getting-started/
- https://reactjs.org/docs/rendering-elements.html
- https://www.twilio.com/blog/react-choose-functional-components
- https://developer.mozilla.org/en-US/docs/Web/JavaScript/Reference/Operators/this
- https://developer.mozilla.org/en-US/docs/Web/JavaScript/Reference/Classes
- https://reedbarger.com/why-we-need-this-in-javascript-and-how-to-know-its-value/
- https://developer.mozilla.org/en-US/docs/Web/JavaScript/Reference/Global_Objects/globalThis
- https://reactjs.org/docs/handling-events.html
- https://www.reddit.com/r/reactjs/comments/5g507t/methods_not_bound_to_es6_classes_why/ - Note: Reddit user "acemarke" is Mark Erikson, a maintainer of the extremely popular React/JavaScript library, Redux.
- https://developer.mozilla.org/en-US/docs/Web/JavaScript/Reference/Functions/Arrow_functions
- https://reactjs.org/docs/state-and-lifecycle.html